We have no internet at home right now, so I'm ensconced in the Champaign public library a few blocks from my house. The library (or Panera) is where I always go when I have need of internet. Comcast is coming tomorrow, which is great, but I had a few things that needed taking care of today. One of which was sharing my great adventure in canning this weekend!
 This is the canning set I got from amazon, courtesy of my fabulous former co-workers at the historical society (thanks guys!). It includes, clockwise from left, the giant canning pot, the jar rack to go on the bottom of the pot, a funnel, a magnet for picking up boiling lids, a lid tightener, tongs for lifting potential hot foods, and a jar lifter. I also got the "Ball Complete Book of Home Preserving" to get me started.

These were the poor fruits (yes, tomatoes are a fruit) that would be the subject of my experiment. I had been scouting out the Urbana farmer's market the first few weeks, and noticed that many stands had large bins of "seconded" produce. Meaning they were either unattractive, bruised, or overripe. The tomatoes I got at $1 a pound ($6 total for that pile there), and the peaches came at $5 for a large bag (the bowl).
The peaches were in worse shape than the tomatoes, so I started with them in case I only had time for one group on Saturday. First I boiled them to get the skins off, and started the "simple syrup" (water and sugar) that would go into the jars to fill them.
 What I quickly learned about canning - and I imagine it'll get easier with experience - is that it was a lot like juggling. I had so many things heating on the stove at once, as well as all the chopping, washing of the jars, and tracking times, that it was a little overwhelming. Here I've got the peaches boiling, the syrup thickening, and the canning pot boiling to heat up the jars (you heat them so they don't crack during all the heat transfers).
 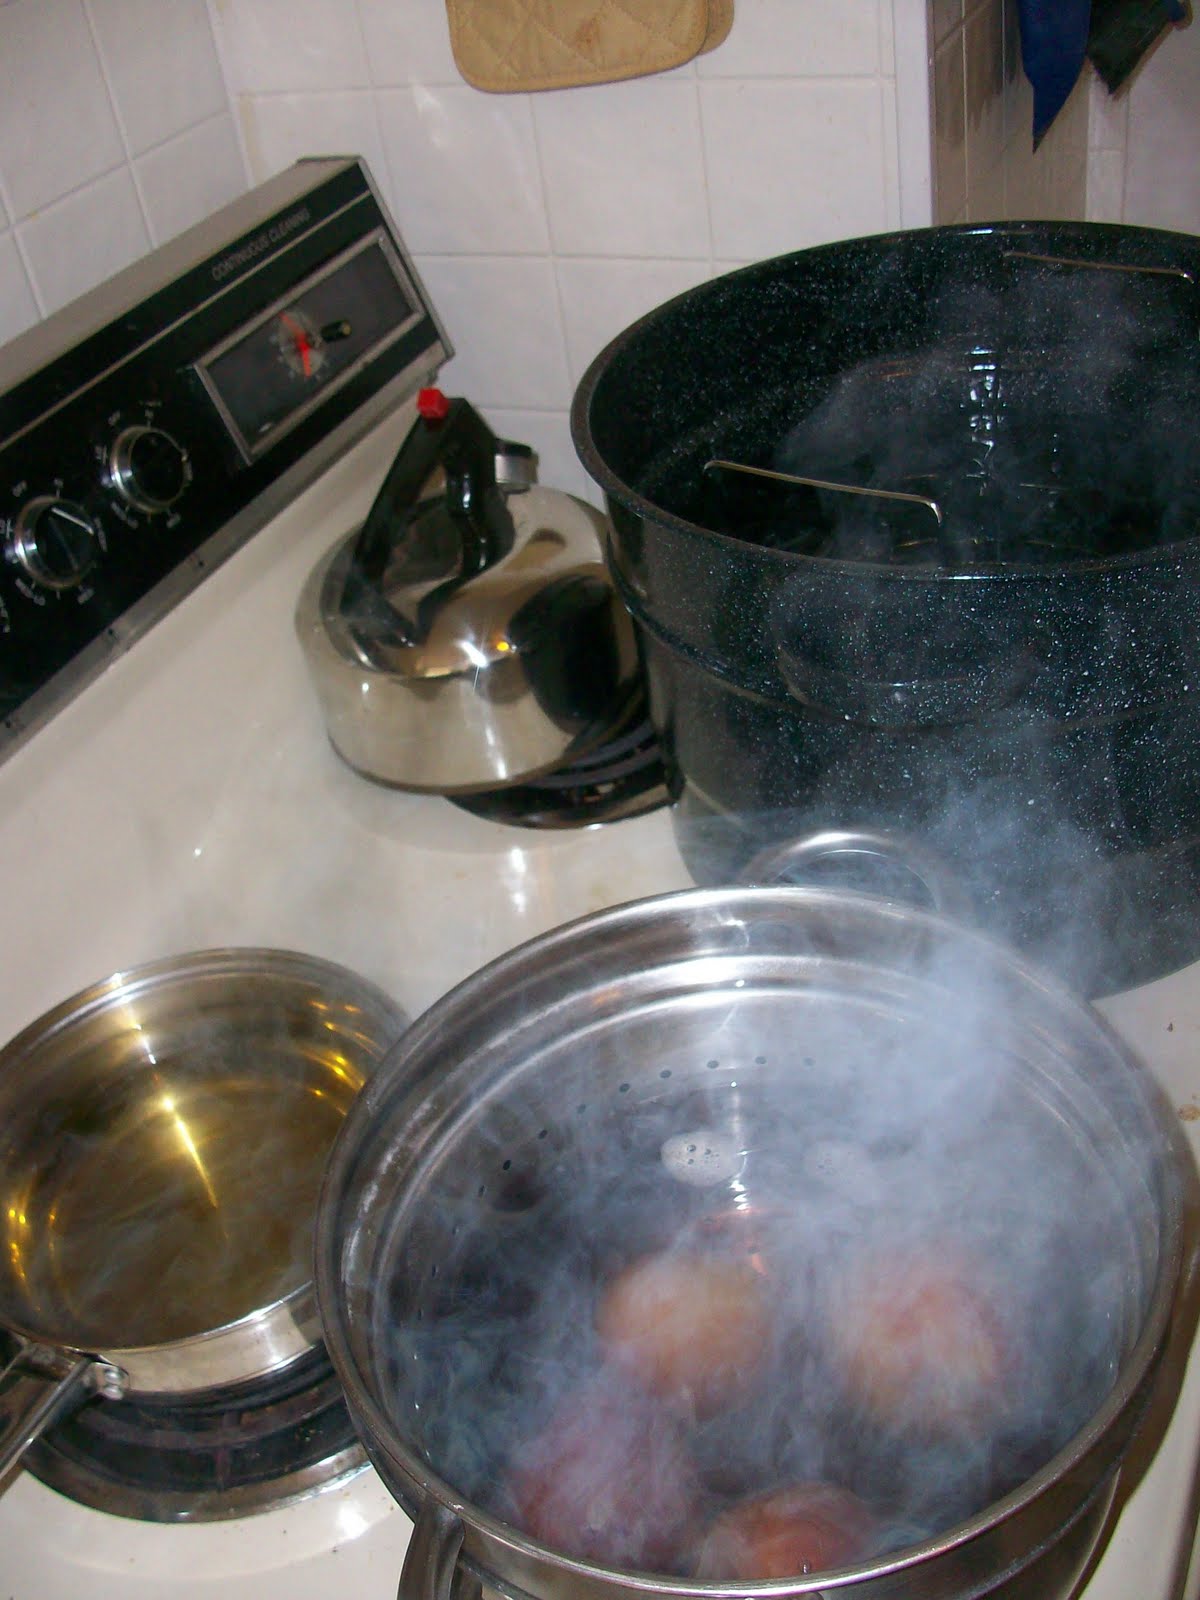 I was also cutting up the peaches that had their skins removed, and trying to estimate how many jars I would need.
  Once I was done prepping jars and peaches, I removed them one at a time from the canner's bubbling water, using my jar lifter tool.
  Filled them up with peaches and simple syrup, wiped off the rim, and placed the lids on top.
  And placed them in the canner, got the water boiling, and let them cook until they (hopefully) sealed.
And here they are! What I approximate was five pounds of peaches made four jars! I'm looking forward to making a pie or cobbler, and putting peaches in my oatmeal in the dead of winter. One of the lessons here though? I can pack my jars much tighter with fruit.
 I did wind up canning the tomatoes that day too, though the process looked so similar I didn't bother with pictures. Boil the tomatoes to get the skins off, chop them up, fill the jars with boiling water, seal, and boil in the canner. These took a lot longer though, boiling for 45 minutes as opposed to the 20 that the peaches took.
$6 of tomatoes turned into four (much more packed) jars, which will be delicious in spaghetti and other dishes.
I'm not convinced I did this correctly, as the lids don't seem as concave as the books all tell me they should be. But I was still happy to give this an honest shot, and keep working towards buying locally and seasonally. I promise to make updates as I continue canning and preserving, hopefully with jams up next!
- Caity
Hey there dear, this is your husbands cousin over in indiana....Maggie......If you pulled the jars out while they were still hot/warm they will seal after cooling off a little bit not actually while they are in the water. Don't be tempted to poke at the lids trying to figure it out, just let them sit a while and listen, you should here a noticeable "pop" sound as the lid sucks down and seals anywhere from 5min to 40min after taking them out of the canner bath.
ReplyDeleteIf you ever want a phone consult on canning you should call his aunt Katie (my mum) or me and we can try to answer questions and calm your fears.
Hi Maggie! Thanks so much for commenting. I unfortunately didn't hear a popping sound, though that's more because I didn't hang out in the kitchen. Next time I'll definitely wait and see what happens. We ate one of the jars of tomatoes on Thursday and seem to be fine, so in the short term the canning process worked.
ReplyDeleteThanks for the offer on the consult. I think we're hoping to actually visit with you all in the next few months (once things settle down), so hopefully we can talk about it then.
Yes, the pop is indeed very important, but if you can't be around to listen for it that's ok. Canned jars work just like store bought ones that say "Safety button pops up when original seal is broken" or something like that. So if the "safety button" is popped up then you need to boil them again and hope they seal the second time.
ReplyDeleteAs a side note, make sure you always boil the jars before you put stuff in them, even if you get pyrex jars so that you don't have to worry about them cracking from heat. They need to be sterile, otherwise you end up with botulism, and I like you and Rookie both far too much, so please don't die. :)
I'll definitely stick around and listen for it when I make the strawberry jam this week. And the jars currently don't have any obvious "safety buttons" popping up, they look pretty smooth on the surface.
ReplyDeleteThe book I have suggests that you don't need to boil them first, exactly, just get them nice and hot so they don't crack. The sterilization should happen while you boil the sealed jars. Or so my book says.